Showing posts with label TAOP. Show all posts

Friday, 20 August 2010

Assignment 5: Applying the techniques of illustration and narrative

I have chosen to photograph the Island of Mull, which is off Scotland's West Coast. It has been our favourite place to visit over the last 3 years that we have lived in Scotland. As we are heading back to Australia at the end of August I thought it would be a challenge to try to capture something of the still beauty of Mull and what makes it such a special place.

I have storyboarded how I imagine these photos might go in a magazine.

Title Page
From Assignment_5_Mull


Page 1,2
From Assignment_5_Mull


Page 3,4
From Assignment_5_Mull


Page 5,6
From Assignment_5_Mull


And here are the individual photographs:


Photo 1. Title Page, Escher 3 worlds

From Assignment_5_Mull


24-70mm f/2.8 lens, Canon 30D, f/11, 27mm, 1/350sec, ISO 200

Photo 2. Page 1, Top, Wild Waves

From Assignment_5_Mull


70-200mm f/2.8 lens, Canon 30D, f/11, 200mm, 1/750sec, ISO 200, -1/2EV

Photo 3. Page 1, Bottom, Still reflections

From Assignment_5_Mull


24-70mm f/2.8 lens, Canon 30D, f/16, 30mm, 1/90sec, ISO 250, -1/2EV

Photo 4. Page 2, Left, Tobermory Harbour

From Assignment_5_Mull


24-70mm f/2.8 macro lens, Canon 30D, f/9.5, 57mm, 1/180sec, ISO 100

Photo 5. Page 2, Right, Keeping in touch

From Assignment_5_Mull


24-70mm f/2.8 lens, Canon 30D, f/8, 24mm, 1/350sec, ISO 100, -1/2EV

Photo 6. Page 3, Travel by boat

From Assignment_5_Mull


24-70mm f/2.8 lens, Canon 30D, f/5.6, 35mm, 1/350sec, ISO 200

Photo 7. Page 4, Top, Powerlines in the mist

From Assignment_5_Mull


24-70mm f/2.8 lens, Canon 30D, f/6.7, 67mm, 1/180sec, ISO 400

Photo 8. Page 4, Bottom, Remote roads

From Assignment_5_Mull


24-70mm f/2.8 lens, Canon 30D, f/6.7, 70mm, 1/750sec, ISO 200

Photo 9. Page 5, Saying goodbye

From Assignment_5_Mull


24-70mm f/2.8 lens, Canon 30D, f/5.6, 40mm, 1/180sec, ISO 200

Photos 10. Page 6, Sunsets at Croggan

From Assignment_5_Mull


24-70mm f/2.8 lens, Canon 30D, f/8, 24mm, 1/20sec, ISO 400, -1EV

Photo 11. Page 6, Sunsets at Croggan

From Assignment_5_Mull


70-200mm f/2.8 lens, Canon 30D, f/8, 120mm, 1/250sec, ISO 250

Photo 12. Page 6, Sunsets at Croggan

From Assignment_5_Mull


24-70mm f/2.8 lens, Canon 30D, f/8, 25mm, 1/10sec, ISO 250

I can hardly believe that I have come to the end of the course. It has been challenging, rewarding, difficult at times and kept me very busy! I've really enjoyed it and feel like my photography has improved quite a lot over the (almost) 2 years that I've taken. I plan on getting assessed and hope to do well but I'm not too bothered as I feel like I'm moving in the right direction of developing my photographic eye and skills along the way. The course has made obvious some of my technical shortcomings - mainly in artificial light use and also photoshop. I hope to keep working on these skills during the People & Places course that I started at the beginning of this year. I also feel like some of my 'natural' ability with framing a good photograph in the camera, and choosing unusual subjects/viewpoints has become more obvious with this course too. It's great fun!! :)

Project 26: Triangles

This project has been a real challenge. I have found the still life part of this project difficult as I'm just not used to thinking about setting up my photographs, it is something I do _so_ rarely. So it's been a long time in the making. The other real difficulty has been finding an inverted triangle by perspective. In the notes it says 'you may have to think about this one'. I've been thinking and thinking and still have got nowhere. So I'm going to post the rest of the project and just keep thinking in the hope that I find one. Perhaps my friendly blog readers can post a comment to help me out?

Triangles are more dynamic and have a sense of activity compared to rectangles & horizontal/vertical lines. It can be useful therefore to construct triangles in photos, or enhance those that are already present there. In this project there were some specific aims, one of which is still evading me.

Photo 1: Real Triangle in a photograph. This photo was taken in Waverley train station Edinburgh.

From Project_26


70mm, f/2.8, 1/125s, ISO200

Photo 2: Triangle by perspective, converging towards top of frame. This was the easy one, all buildings when photographed from below converge towards the top of the frame. This is taken in Marchmont Edinburgh.

From Project_26


24mm, f/5.6, 1/500s, ISO320

Photo 3: Triangle by perspective, converging towards bottom of frame. I'm still thinking about this one!

Photo 4: 3 people in a group. This photo of was taken on the Isle of Arran, with 3 friends looking out to sea for birds. A distant island is on the horizon.

From Project_26


70mm, f/6.7, 1/500s, ISO200

Photo 5: Still life, apex at top. This small setup is on our fridge, and is made up of shopping list, egg timer and magnets. It was fun to play with different compositions, and the simple triangular setup works well.

From Project_26


50mm, f/3.5, 1/60s, ISO400

Photo 6: Still life, apex at bottom. This is another kitchen setup, this time consisting of the ingredients for a pasta dish. I have arranged the ingredients on our stovetop which provides the plain black setting. The slightly asymmetrical loose triangular setup is more interesting than a random placement of objects.

From Project_26


40mm, f/2.8, 1/45s, ISO500

This project has been slow to finish, partly because of the difficulty of finding the perspective image, but also because I am a bit wary of still lifes! Triangles do make the composition more interesting and I have been using them in my photography since I started this project (October last year!)

Project 61: Making the best use of built-in flash

Project 61: Making the best use of built-in flash

The aim of this project is to make the student aware of how built-in flash (or a small extra on-camera flash) can be used, and some potential pitfalls of this type of flash.

Shiny surfaces are difficult to photograph, as they reflect the light - I really noticed this when doing the final part of this project, which was photographing an object against a bright window - the flash was reflected in the window! I could crop my images to remove the flash, but it is fine for the purposes of this project. In photo 3 the light is reflected from the spoons but the effect is not so harsh - so in some instances the reflecting effect can be good, even interesting.

Photo 1

From Project_61


50mm, f/1.8, 1/180s, ISO100, flash pointing at subject

Photo 2

From Project_61


100mm, f/2.8, 1/180s, ISO100, flash bounced from ceiling

Photo 3

From Project_61


100mm, f/2.8, 1/180s, ISO100, flash pointing at subject

Photo 4

From Project_61


100m, f/2.8, 1/180s, ISO100, flash bounced from ceiling

The shadows can be quite harsh when the flash is pointing directly at the subject, for example in Photo 1. This effect is lessened when the flash is pointing at the ceiling, though perhaps I am too close to the subject in Photo 2 for this to work well. When photographing a painting (Photo 5 and 6), the textures on the painting are seen if the flash is pointed directly at the photo, whereas the light is softer when the flash is pointed at the ceiling.

Photo 5

From Project_61


100mm, f/2.8, 1/60s, ISO100, flash pointing at subject

Photo 6

From Project_61


100mm, f/2.8, 1/60s, ISO100, flash bounced from ceiling

Only one plane within the photo can be lit when using on-camera flash, certainly when pointing directly at the subject. I have photographed a mobile hanging in our flat (photos 7 and 8). When the flash is pointing at the mobile only it is lit, whereas when I point the flash at the ceiling, both the mobile and wall behind (about 2m away) is lit. In this case, the former is better because the mobile is more isolated and because it is bright and colourful it stands out against the dark background.

Photo 7

From Project_61


100mm, f/2.8, 1/60s, ISO100, flash pointing at subject

Photo 8

From Project_61


100mm, f/2.8, 1/60s, ISO100, flash bounced from ceiling

Light falls of exponentially, so the flash needs to be quite powerful to light an object more than a few meters away, thought this has the advantage that at that distance the flash won't overwhelm the photograph, as it does when shooting very close to the subject. Photo 9 is taken with the lens as close as it can focus - the teddy is very bright and quite harshly lit. In photos 10 and 11 I have stepped about 1 1/2m back from the subject and used similar settings. Photo 10 is directly comparable, with the flash pointing directly at the subject, and the light is much softer and more pleasant. In Photo 11 I have pointed the flash at the ceiling which makes the light reflected off the sofa have fewer harsh shadows. The whole photo is more evenly lit in this case, and looks much more naturally lit.

Photo 9

From Project_61


70mm, f/2.8, 1/4s, ISO500, flash pointing at subject

Photo 10

From Project_61


70mm, f/2.8, 1/4s, ISO500, flash pointing at subject

Photo 11

From Project_61


70mm, f/2.8, 1/4s, ISO500, flash bounced from ceiling

From the above, I can see that in general it's better to point the flash away from the subject, for more even, natural lighting. I also have a diffuser for my flash head which gives a similar effect. Sometimes pointing the flash directly at the subject is good for making the subject stand out against the background, isolating it. This depends completely on the subject in question and the aim of the photograph.

For the final part of this project, I photographed one scene which was backlit (against a bright reflective window!) to see the effect of using fill-flash. Photo 12 has no flash - here the bamboo is almost silhouetted against the buildings in the distant background. With a full flash pointing directly at the window the plant is nicely lit, though the reflection from the window is not very attractive (Photo 13). I then tried keeping the same flash setting and changing the exposure of the photo - Photo 14 is -1EV, and Photo 15 is -2EV. These have the effect of keeping the light on the plant quite constant (influenced by the flash) but making the background darker. Though they are impacted in this case by the flash reflecting on the window, this effect could be useful in other situations to make the subject stand out against a busy background. Photo 16 and 17 are slightly different- keeping the exposure correct and reducing the flash output, first to -1stop and then -2stop. I think this is not as effective with this subject, but again could be useful to have some extra light on a subject (eg a person) without overwhelming the photo with the flash. I then tried pointing the flash at the wall (Photo 18) and ceiling (Photo 19). I think these are the most effective in terms of natural, even lighting (as with my earlier finds for this project). In Photo 18 the light comes from the left and so is flattering on the smooth curves of the plant, without harsh shadows. In Photo 19 the light comes slightly from above, and so while the lighting is not as interesting as in Photo 18, it is even and not harsh.

Photo 12

From Project_61


57mm, f/5.6, 1/30s, ISO500, no flash

Photo 13

From Project_61


57mm, f/2.8, 1/180s, ISO500, flash pointing at window

Photo 14

From Project_61


57mm, f/4, 1/180s, ISO500, -1EV, flash pointing at window

Photo 15

From Project_61


57mm, f/5.6, 1/180s, ISO500, -2EV, flash pointing at window

Photo 16

From Project_61


57mm, f/5.6, 1/45s, ISO500, flash -1EV, flash pointing at window

Photo 17

From Project_61


57mm, f/5.6, 1/45s, ISO500, flash -2EV, flash pointing at window

Photo 18

From Project_61


57mm, f/2.8, 1/180s, ISO500, flash bounced from wall

Photo 19

From Project_61


57mm, f/2.8, 1/180s, ISO500, flash bounced from ceiling


There is much to take away from this project. Playing with the on-camera flash makes me more comfortable with its use (though not with the manual settings of my 580 which are still a challenge to be faced!). I think that I'll try playing with the exposure settings of both the flash and camera and probably use the flash a bit more in my photography. It would be good to try using it more when I'm out and about photographing on the street - I think there are many cool effects that can be done with the on-camera flash. It's also been a good project to learn about the limitations of the flash too. I have a cord that I can use to take the flash off the camera, but I would prefer to be able to do this wirelessly, so I might try to pick up a cheap wireless controller some time. This would open up more creative solutions for the flash. As I am coming to the end of TAOP I need a new challenge (apart from the P&P course!), so perhaps I will try to master a bit better my artificial lighting skills.

Wednesday, 18 August 2010

Project 53: Fluroescent lights

The aim of this project was to observe the effect of shooting in fluro lighting, and to use colour balance (in the case of digital shotting) to remove the various colour casts that fluros give off. I took photos in 4 different interiors; a supermarket, home, shop and art gallery. In each of the photos I think the best (closest to reality) WB setting is Auto WB. I feel like both the Sunny WB and the Fluro WB at times give an unpleasant colour cast. I think the lesson with this project is to use Auto WB when shooting inside unless there is a lot of natural light around, or some test shots can be done with different settings at the start of the shoot. I have had problems before with using Auto WB if the photos are to be used as part of a set, and the colour cast changes throughout the set. This could perhaps be overcome by setting the WB manually (which I have not tried) or using the RAW files and manually setting WB that way (which I also don't often do).

Apparently the variations in colour cast are due to factors like the make of the lamp and that they can change colour with age. The only sure way to know how to set the WB is to do test shots or edit the RAW file later.

The four interiors are shown below, each set of photos with 3 different white balance settings:

From Project_53


From Project_53


From Project_53


From Project_53

Tuesday, 10 August 2010

Project 46: Choosing the moment

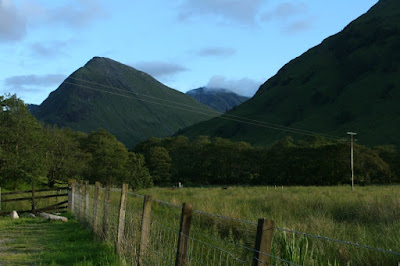
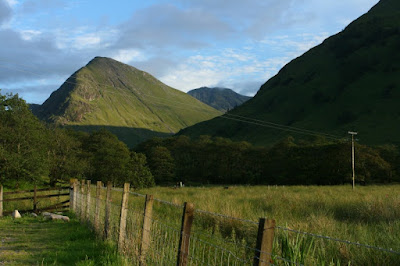
The aim of this project is to take a series of photos of exactly the same scene, and to watch how the shadows and light change across a few hours, nominally just before sunset or just after sunrise. I chose to do this project when we were on our summer holiday recently in Glencoe. The scene was chosen because it had a background (mountains which would catch the light), midground (trees and powerlines which might occasionally catch the light) and foreground (field and fence which would get bits of light depending on the clouds). I thought the composition was quite interesting, with the mountains being strong diagonals/triangles in the photo, and the strips of sunlight across the field horizontals.

I set up with tripod and cable release, and for the first few photos I experimented with exposure compensation. I ended up taking most photos with both -1/2ev and -1ev. This set of photos is all -1ev.

The light changes were quite dramatic. I was surprised with how quickly the light changed, and the way it changed on the foreground and background was different. This meant I took a lot of photos. For this project I have selected 16 photos which show the changes over the 1 1/2 hours I was out for and also some of the more dramatic changes which occurred over minutes.

The best photos are those that have dramatic differences between the brightly sunlit areas and the darker shaded areas, photo 14 in particular is a favourite.

All photos were taken with the same setup (except shutter speed which varied because of the changes in light levels):

35mm, f/9.5, ISO200, -1EV, tripod

Photo 1: 6:55pm, 1/250s

From Project_46


Photo 2:7:03pm, 1/125s

From Project_46


Photo 3: 7:24pm, 1/90s

From Project_46


Photo 4: 7:27pm, 1/90s

From Project_46


Photo 5: 7:29pm, 1/60s

From Project_46


Photo 6: 7:31pm, 1/125s

From Project_46


Photo 7: 7:32pm, 1/90s

From Project_46


Photo 8: 7:46pm, 1/60s

From Project_46


Photo 9: 7:48pm, 1/90s

From Project_46


Photo 10: 7:50pm, 4/45s

From Project_46


Photo 11: 7:56pm, 1/45s

From Project_46


Photo 12: 7:56pm, 1/60s

From Project_46


Photo 13: 7:57pm, 1/60s

From Project_46


Photo 14: 7:58pm, 1/60s

From Project_46


Photo 15: 8:00pm, 1/45s

From Project_46


Photo 16: 8:31pm, 1/10s

From Project_46


I have found this to be a very rewarding project. It has taken me some time to find a suitable location where I could be close to home (a caravan in this instance!) and the weather and location be good for taking a series of photos. I was surprised with the speed of change of the light, and also how dramatic the changes were. It was very refreshing!